Use Notion as Customer Relationship Management System
A Customer Relationship Management (CRM) System is a tracking dashboard that aims to manage the way your business interacts with customers and potential customers and improve relationships with your customers. This becomes a single source of truth for account managers and everyone else working on the account to have an overview of what has happened, what customer requests are pending and how best to plan the engagements ahead.
A CRM system is essential for effectively managing your business interactions with current and potential customers. A well-structured CRM acts as a single source of truth for account managers and team members, enabling them to track customer requests and plan future engagements efficiently.
If you’re familiar with popular CRM tools like Salesforce, you understand the importance of logging communications such as phone calls and emails. In this guide, we’ll explore how to leverage Notion, a versatile productivity tool, to create a powerful CRM system for your business. We’ll cover the use of Notion’s components—such as properties, views, databases, filtering, and sorting rules—to build your unique CRM.
Getting Started: Building Your Notion CRM
To kick things off, we’ll provide a step-by-step walkthrough of the free TaskRobin CRM Template, which will help you quickly set up your Notion as a CRM system.
Get your free copy of the TaskRobin Notion CRM Template here!
Step 1: Save Emails in Your Notion Database
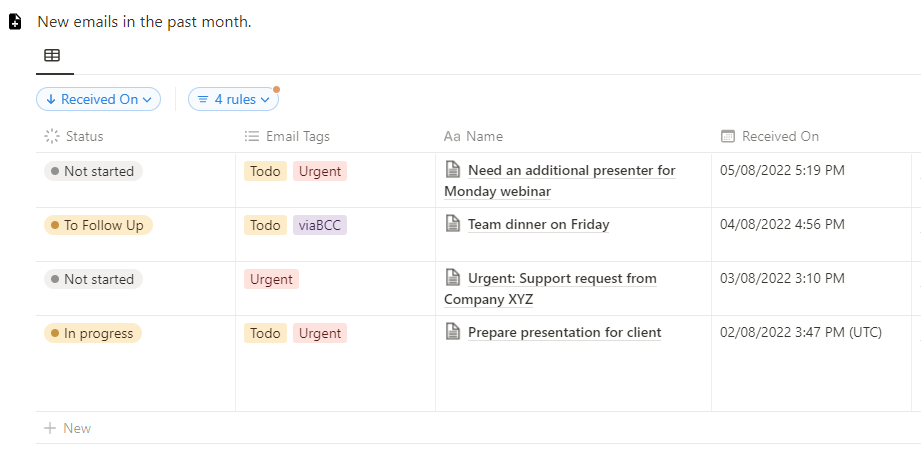
The foundation of your Notion CRM will be the email database, where you can log crucial email interactions. This is similar to using Excel or Google Sheets for data management. By maintaining a central database, your team can easily track the latest interactions with each customer.
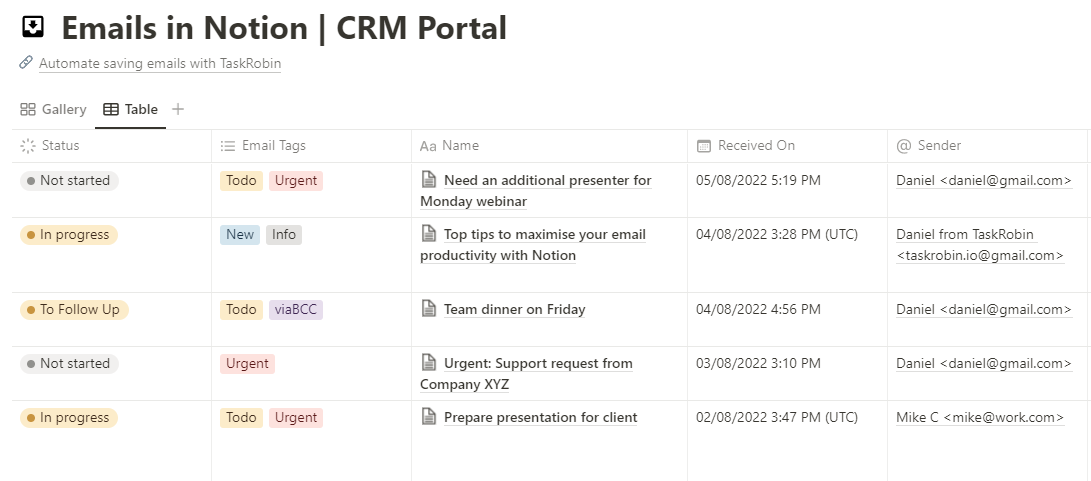
In this database, you will record essential email details, including the subject, sender, CC, date, message body, attachments, and two additional toggles for managing the tracked emails: “Status” and “Email Tags.”
Two Methods to Save Emails
- Manual Entry: Copy and paste crucial email information from your inbox. However, this method can be time-consuming and may not include attachments.
- Automated Saving Emails with TaskRobin: Use TaskRobin to automatically save emails to Notion. Simply forward your emails to a TaskRobin forwarding inbox, and all your emails will be uploaded to Notion, with fields automatically populated and file attachments included. Learn how to set up email forwarding here.
Step 2: Create Your CRM Dashboard
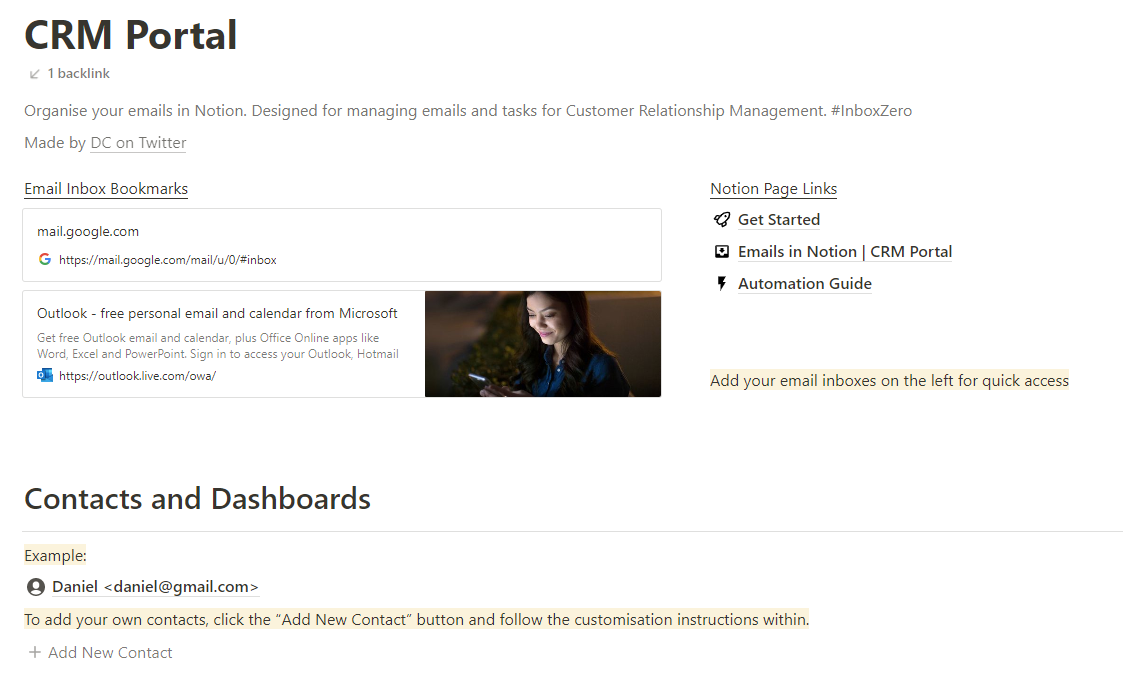
With your emails now stored in Notion, it’s time to create customer dashboards for displaying interactions and tracking the status of each customer.
In your main CRM Portal Notion page, scroll to the “Contacts and Dashboard” section. Click the “+ Add New Contact” button to create a dedicated page for each customer. Notion’s built-in walkthrough guides will help you set up each page effectively.
Key Components of the Customer Dashboard
Customer Details: Input basic information and remarks about each customer.
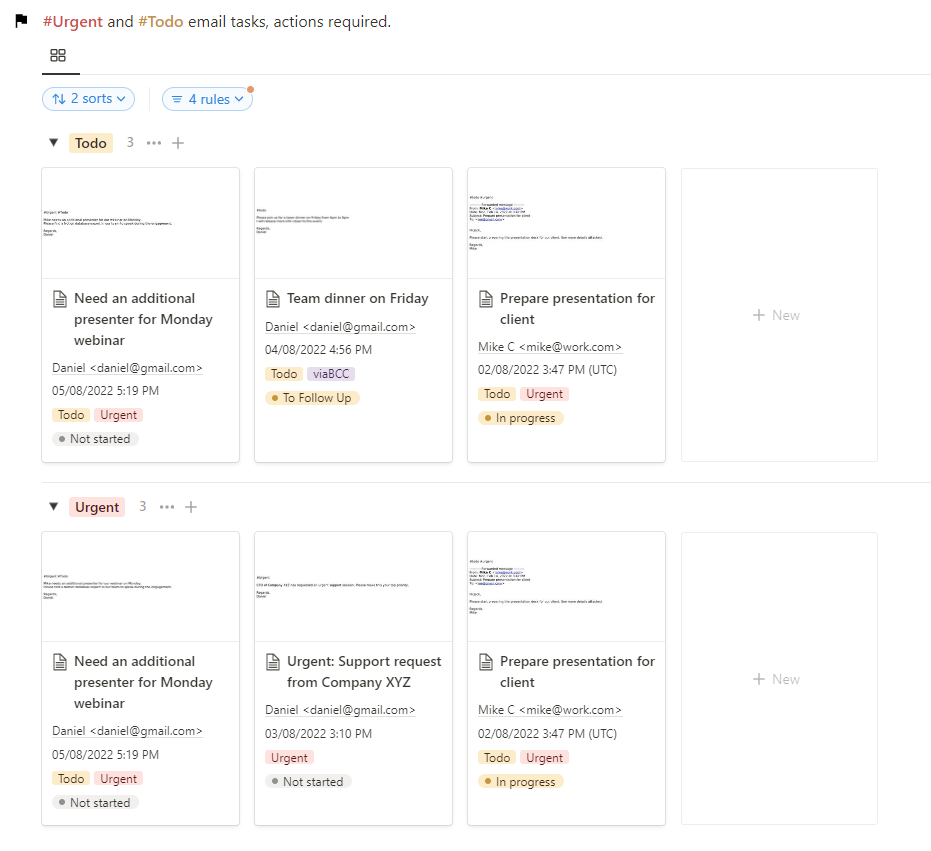
High Priority Email Tasks: Display emails tagged with “Urgent” and “Todo.” You can manually tag emails in the database or apply a #tag when saving via TaskRobin. Learn more about tagging here.
Latest Emails: View the most recent email communications, organized by the “Received On” time stamp column.
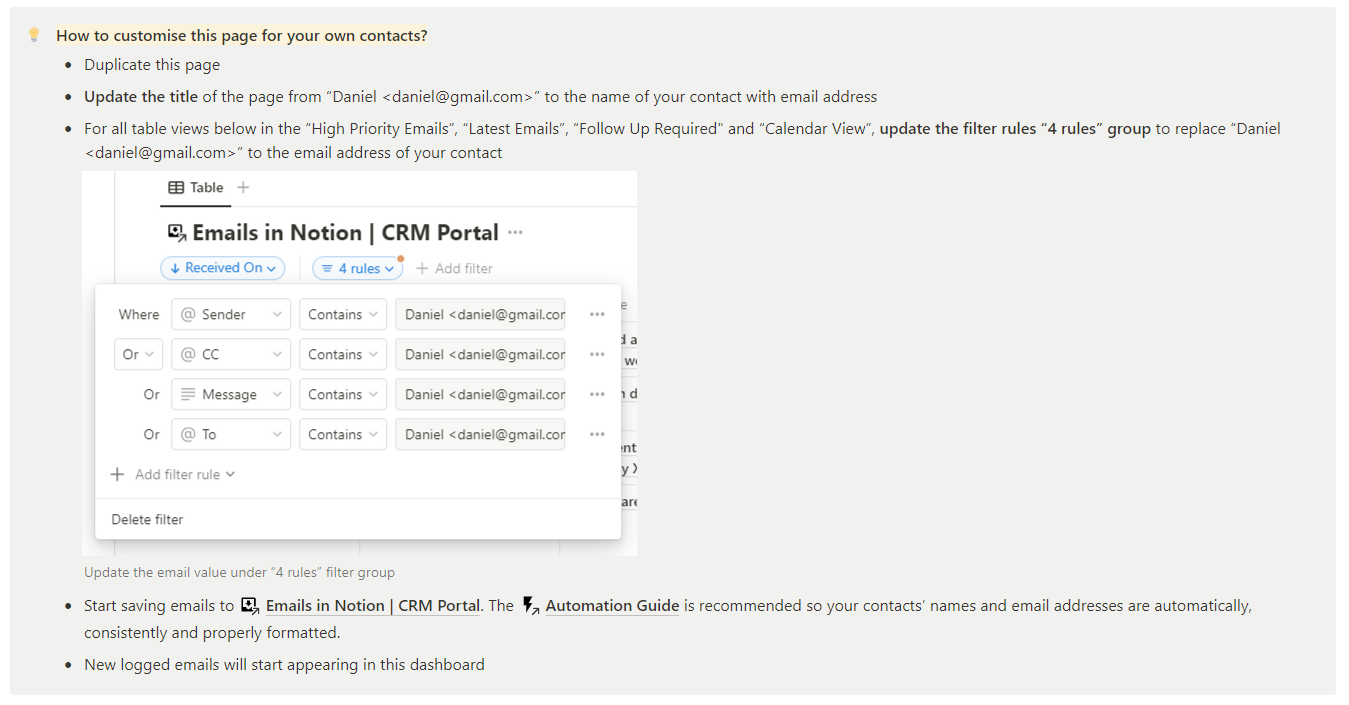
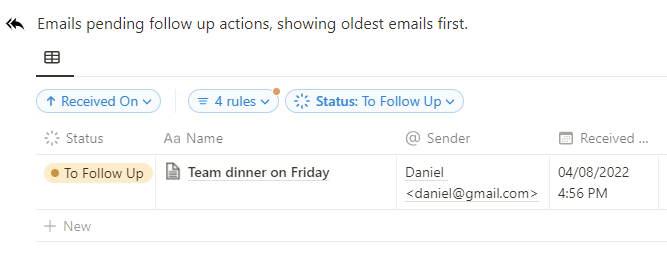
Follow Up Required: Track pending emails that require replies or actions, filtered based on the “Status” column.
Calendar View: Visualize your team’s interaction frequency with customers, helping to determine the right timing for follow-ups.
Step 3: Create and Auto-Fill Tags in Custom Properties
Consider using TaskRobin’s auto-fill rules to automatically assign tags to saved emails. By creating an auto-fill rule on a selected property, you can ensure that every email saved via TaskRobin includes the appropriate tags, such as “New” or “Todo.”
This feature allows you to establish additional sorting and filtering rules in your Notion views, tailoring your CRM template to fit your unique workflow.
Conclusion
With this guide, you are now equipped to create and customize your very own Notion CRM system. A well-structured CRM is vital for any successful business, and using Notion along with TaskRobin can provide a cost-effective solution for managing customer relationships efficiently.
If you find our TaskRobin Notion CRM template helpful, please consider giving it a good rating!