Notion for Customer Support Management
Notion has rapidly emerged as one of the most popular project management tools in the past two years. Whether you’re a small business owner or a professional managing customer support, Notion’s versatility makes it a powerful choice.
But why do so many professionals switch to Notion? Simple: Notion is flexible. It offers a structured yet customizable system that can be used for professional work, project management, and even personal organization. From tracking work tasks to managing customer issues, Notion adapts to any workflow. However, with this flexibility comes a learning curve, especially when setting up your workspace from scratch.
Good news—you don’t have to start from scratch! At TaskRobin, we’ve built a free Notion template designed specifically to help you manage customer support tickets and perform root cause analysis, giving you actionable insights to improve your business processes.
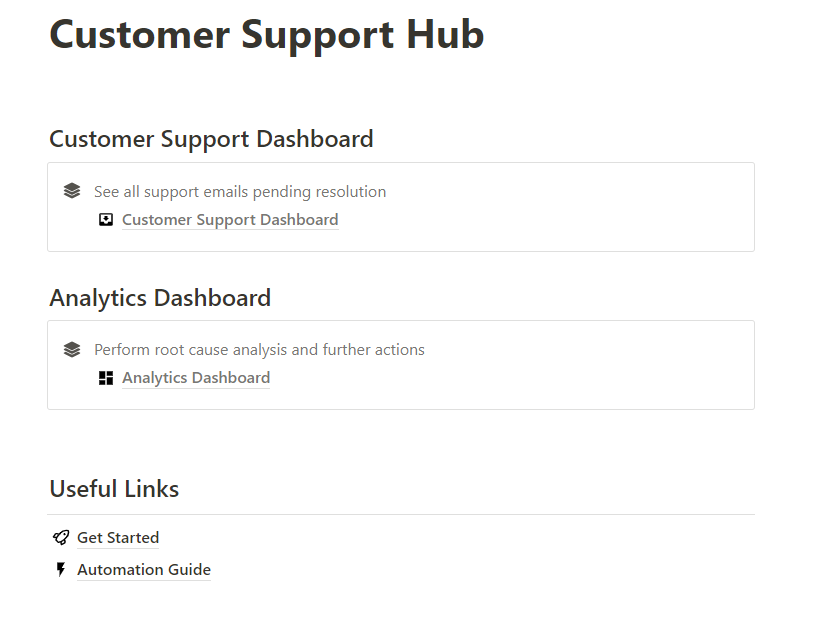
You can download TaskRobin’s Customer Support Hub Notion template for free here. If you find it helpful, please consider giving it a rating!
Why Use TaskRobin’s Customer Support Template in Notion?
This template is perfect for teams or individuals who handle multiple customer support requests—especially if those requests come via email. By combining Notion’s flexibility with TaskRobin’s integration, you can automatically capture customer support emails and track their statuses in Notion. Here’s how TaskRobin streamlines this process:
- Automated Email Forwarding: With TaskRobin’s Notion email integration, simply set up automatic forwarding of customer emails. No more copying and pasting; TaskRobin saves your emails directly into your Notion dashboard.
- Tagging and Organization: TaskRobin enables automatic tagging, allowing you to sort and categorize emails easily. For example, you can tag your emails in Notion based on urgency, type, or follow-up status by adding a #hashtag to the top of the email message or to the subject line as you manually forward your emails to TaskRobin.
Step-by-Step: How to Use the TaskRobin Notion Template for Customer Support
1. Log Support Emails in Notion
Once TaskRobin is set up, your incoming support emails will appear in the Emails in Notion database. This eliminates the need for manual data entry. You can focus on responding to your customers instead of wasting time organizing incoming messages.
If you prefer to manually add emails, you can copy and paste your emails into the dashboard, but TaskRobin will do the heavy lifting for you.
2. Prioritize and Manage Support Requests
The template’s Customer Support Dashboard helps you track and prioritize customer requests based on urgency or required action. For example:
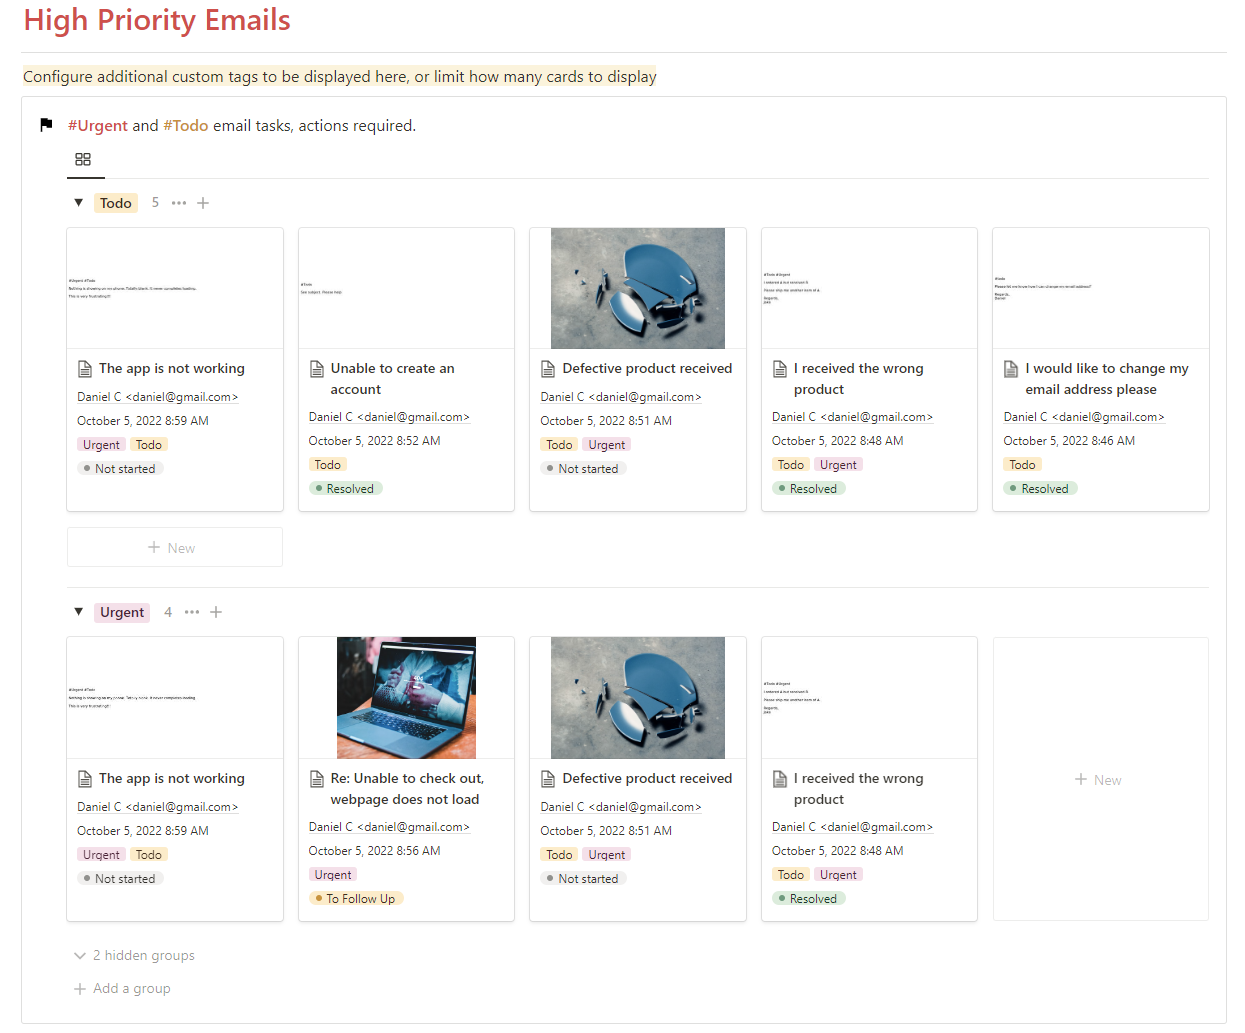
You can customize this view to highlight urgent issues or requests that need immediate action, like those tagged #Urgent or #Todo. The system lets you effortlessly switch between different tags based on the issue’s nature and urgency.
3. Track Follow-ups and Responses
Maintaining prompt responses is crucial for good customer service. In Notion, the “To Follow Up” tag helps you keep track of tickets that need further action. This ensures that no customer requests fall through the cracks.
4. Root Cause Analysis with the Analytics Dashboard
This is where things get exciting. The Analytics Dashboard in our Notion template allows you to perform a root cause analysis on your customer support tickets.
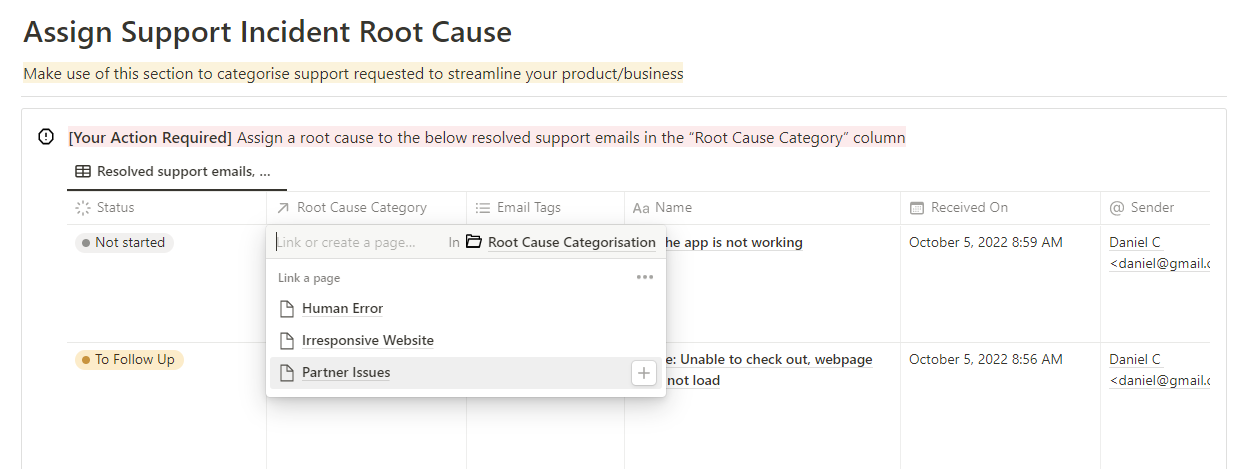
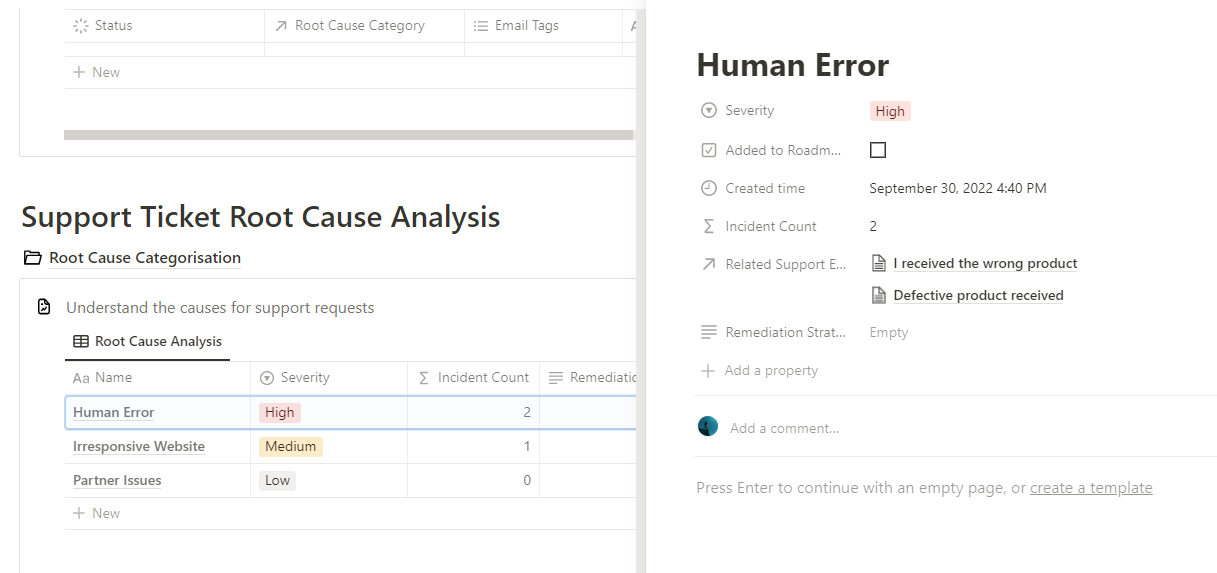
For every resolved support request, you can assign a root cause category, such as “Human Error,” “Website Issues,” or “Partner Problems.” TaskRobin helps you tag and track these categories, giving you a clearer picture of recurring issues.
5. Analyze Support Data and Optimize Processes
Once you’ve categorized your support issues, you can see patterns emerge in the Analytics Dashboard. You can track how often each root cause occurs and the associated severity. This is vital for improving your business processes and enhancing customer satisfaction over time.
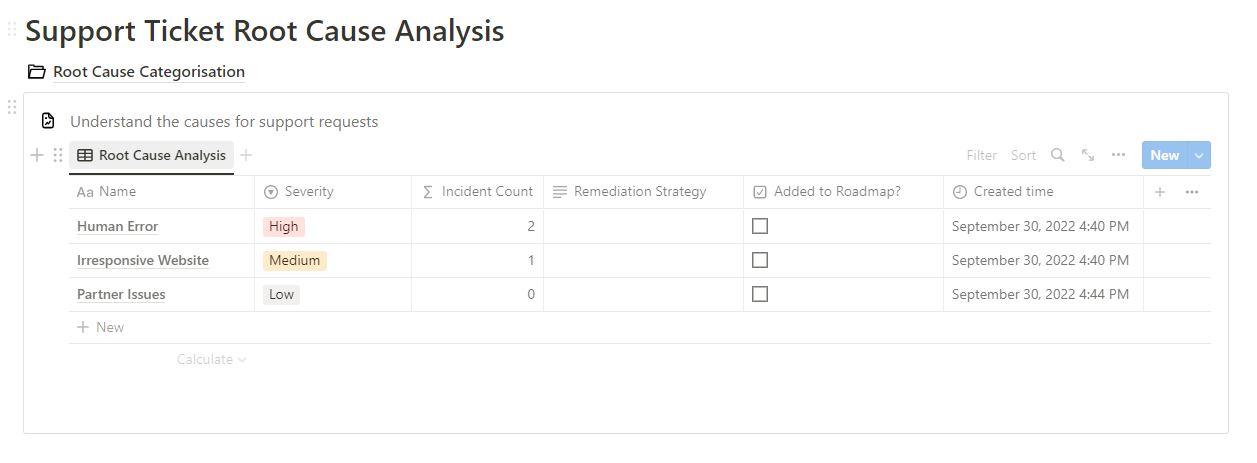
For each category, you can dive deeper into individual incidents, allowing you to reference specific issues and work on actionable improvements. By continuously analyzing this data, you’ll be able to:
- Spot recurring problems
- Tackle high-priority issues
- Improve your systems for better customer support
Why Root Cause Analysis is Important
Tracking and categorizing customer support issues helps identify pain points in your business operations. By understanding the root causes behind common customer complaints, you can:
- Prevent recurring issues
- Improve product/service quality
- Enhance customer satisfaction and loyalty
Get Started with TaskRobin’s Customer Support Hub
If you haven’t already, download TaskRobin’s Notion Customer Support Hub for free. Here’s a quick recap of what you can do with this template:
- Automatically capture support emails in Notion using TaskRobin.
- Track and manage customer issues in one place.
- Perform root cause analysis to spot trends and optimize processes.
- Easily customize the template for your specific support workflow.
TaskRobin makes customer support management seamless, efficient, and data-driven. Whether you’re managing support for a small team or a large company, this Notion template combined with TaskRobin’s email integration will save you time and improve your customer relationships.
Don’t wait—start enhancing your customer support management today with TaskRobin!